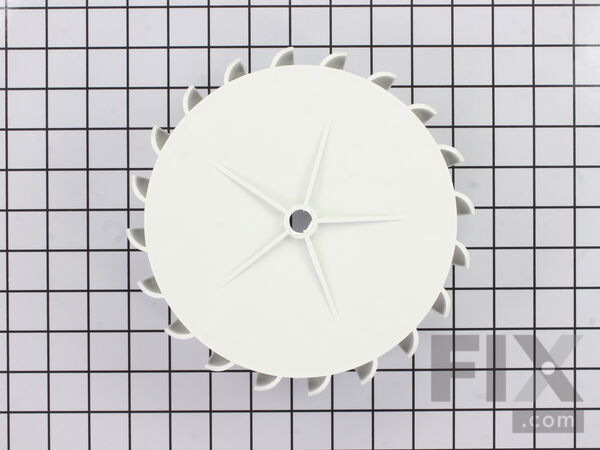
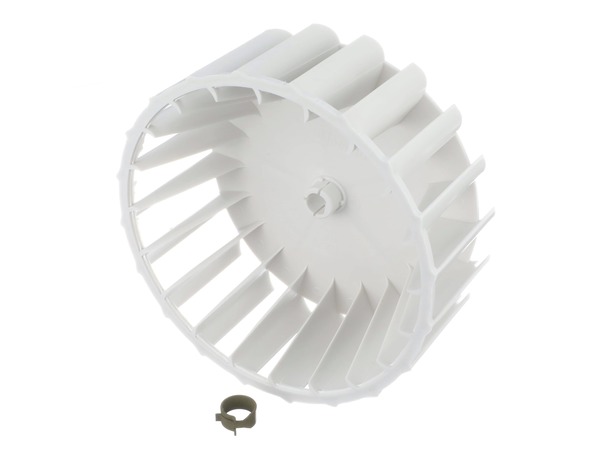
Part Location Diagram of Y303836 Whirlpool Blower Wheel with Clamp
See part 17 in the diagram
Replacing your Maytag Dryer Blower Wheel with Clamp
( Grid squares measure 1x1 inch )

Blower Wheel with Clamp Y303836

★★★★★
★★★★★
3 Reviews

Rated by 30 customers 

?

Really Easy 

30 - 60 mins 

Ratings submitted by customers like you who bought this part.

?
$22.86
In Stock
Fix Number:
FIX2200270
Manufacturer #:
Y303836
Manufactured by:
Whirlpool

Product Description

The blower wheel is responsible for blowing heat into the dryer drum, and out of the exhaust vent. If you notice that your dryer is taking too long to dry or is make unusually loud noises, it may be time to replace the blower wheel. This genuine OEM replacement part comes with a metallic clamp that holds the wheel in place. This part attaches to the drive motor shaft and can be accessed by removing the front panel of the dryer. Be sure to disconnect the power supply before beginning this repair.

Videos For installing this part.

Replacing your Blower Wheel with Clamp

Replacing your Blower Wheel with Clamp

Questions and Answers

We're sorry, but our Q&A experts are temporarily unavailable.
Please check back later if you still haven't found the answer you need.

View More View Less
Tumbler and Motor Belt
$32.39
In Stock
Retaining Ring
$7.87
In Stock
Affresh Washing Machine Cleaner - 3 pack
$12.58
In Stock
Produce Preserver Filter
$21.50
In Stock
Affresh Dishwasher Cleaner Tablets - 6
$19.09
In Stock
Cooktop Cleaning Cream
$15.57
In Stock
Cooktop Cleaner
$17.74
In Stock
Affresh Cleaner
$19.09
In Stock

Installation Instructions Provided by Fix customers like you.

Average Repair Rating: 3.3 / 5.0, 30 reviews.
  • 1
  • 2
  • 3
Sort by:
Sorry, we couldn't find any existing installation instruction that matched.
Customer:
ROBERT from RUMSON, NJ
Parts Used:
W10410999, WPY312959, Y303836
Difficulty Level:
Easy
Total Repair Time:
More than 2 hours
Tools:
Nutdriver, Pliers, Screw drivers, Socket set, Wrench (Adjustable), Wrench set
The motor died on my 38 year old Maytag dryer.
Because of the New Year's Holiday, it took 6 days to get the 2-3 business day ordered parts. I disassembled the dryer and cleaned it as I went. During disassembly, the blower wheel fell apart when the retaining clamp was removed. When the drum was out, I had good access to the motor which did not move when I tried to turn the shaft. I then ordered the parts and waited for 6 days. The new motor electrical connections were different from the original motor but the proper crimp terminals were provided with the motor and the connection instructions were clear. Assembling the belt required an internet search to determine the correct side of the belt to the drum. The instructions said smooth side to the drum, but the belt had a rubbery grooved side and a flat brought side. I confirmed from an internet search that the "smooth" side in the instructions meant the rough side of the belt. If you do this job make sure that you have a crimper for the wire terminals and a ring clip pliers for the two ring clips that hold the blower wheel in place.
5 of 8 people found this instruction helpful.
Was this instruction helpful to you?
Thank you for voting!
Customer:
Erik from Belvedere, CA
Parts Used:
Y303836
Difficulty Level:
Really Easy
Total Repair Time:
15 - 30 mins
Tools:
Nutdriver, Screw drivers
Noisy 'rattling' sounds from Dryer ->bad blower fan wheel
Watched the video - really helped me get prepared. Very simple repair: first, unplug power! Removed front panel 2 screws & slowly pulled panel outward to release top clips (2min). At unit bottom, removed the blower fan grey cover (7 screws, 3min). Pulled spring washer (careful not to bend) from shaft and removed spring clip on blower f an wheel (5 min). Installed new blower fan wheel onto shaft with washer&clip. Reinstalled blower cover/screws and front panel/screws. Total time about 15min. Thanks for an easy, inexpensive fix!
5 of 5 people found this instruction helpful.
Was this instruction helpful to you?
Thank you for voting!
Customer:
Ethan from PENFIELD, NY
Parts Used:
Y303836
Difficulty Level:
Really Easy
Total Repair Time:
30 - 60 mins
Tools:
Pliers, Screw drivers, Socket set
Loud vibrations/sounds during operation, Blower fan had worn a out the "D" shaft hole.
Step 1: Unplug dryer
Step 2: Using a stubby Phillips head screw driver remove the 2 screws on the bottom of the front cover on the dryer.
Step 3: Lift panel up and out until the clips disconnect from the top plate.
Step 4: Carefully pivot and swing the panel to the left side leaving wires connected.
Step 5: Rem ove 1/4 grounding screw from left of the lint trap assembly.
Step 6: Remove lint trap assembly 4 1/4" screws from the inside of the dryer holding it, put it to the side.
Step 7: Remove the 6 1/4" screws from blower fan cover.
Step 8: Remove 9/16" screw holding the cover to the bottom panel and carefully pull cover out of the way leaving wires
connected.
Step 9: Using cir-clip pliers remove the cir-clip form the motor shaft.
Step 10: Using normal pliers squeeze metal clamp and remove from blower fan.
Step 11: Clean out the lint from the area.
Step 12: Remove blower fan and replace.
Step 13: Install blower fan on the motor shaft and install the cir-clip and clamp.
Step 14: Reassembly fan cover, lint trap assembly, ground wire and front panel. Have the front panel sung outward to get the top
clips into position.
4 of 4 people found this instruction helpful.
Was this instruction helpful to you?
Thank you for voting!
Customer:
Stan from Pinckney, MI
Parts Used:
Y303836
Difficulty Level:
Very Easy
Total Repair Time:
30 - 60 mins
Tools:
Nutdriver, Pliers, Screw drivers
Dryer rumbling could be mistaken for worn drum rollers.
To differentiate turn drum and stop it by hand. If rumble continues dryer fan is spinning on axle due to plastic hub worn out.Remove angled front panel with Phillips screwdriver. Inspect fan blower mounted to axle. If it wobbles or spins replace it. Remove fan cover with nut driver. Remove clip holding fan to axle. Replace fan assuring flat matches axle. Replace retainer clip. Replace fan cover. Replace front panel. Test.
2 of 2 people found this instruction helpful.
Was this instruction helpful to you?
Thank you for voting!
Customer:
Orrin from La Canada, CA
Parts Used:
WPY312959, Y303836, WP314820, 306508
Difficulty Level:
Really Easy
Total Repair Time:
1- 2 hours
Tools:
Nutdriver, Pliers, Screw drivers, Socket set
Dryer makes horrible noise but drum still turns.
The old dilemma is whether to fix a >20y/o dryer, or just buy a new one. With minimal effort, it was easy to find the source of the noise by manually turning the drum. Noise in the front turned out to be the blower wheel which is located right in the front of the dryer. Removing about 6 screws shows the motor shaft wore out the plastic ce nter of the blower wheel and so the blower wheel was not spinning properly and bouncing around in the housing. Typing in the Model # in PartSelect.com gave me the whole diagram and exactly what to order. Since I had the dryer apart anyway, I decided to go ahead and replace the felt seals and drum/motor belt and front glides. Easy instructions to do all of this is available on multiple YouTube videos. The only caveat is some of these items are held in w/ snap rings. It's possible to deal with snap rings using a small screwdriver and pliers but having special snap ring pliers makes this step a whole lot easier. In my case the drum support rollers and belt tensioner roller turned out to be fine and only needed some lubrication. Also, in this particular model, the felt seals are held on w/ sheet metal tabs and do not require the expensive heat resistant glue. All parts installed, dryer back together and works perfectly on the very first try! Saved me a ton of money and the wife is happy, thanks to this site!
2 of 2 people found this instruction helpful.
Was this instruction helpful to you?
Thank you for voting!
Customer:
R. from Billings, MT
Parts Used:
WPY312959, Y303836, WP9703438
Difficulty Level:
Easy
Total Repair Time:
30 - 60 mins
Tools:
Nutdriver, Pliers, Screw drivers, Socket set
Blower wheel slipping on shaft
watched a Youtube video how to open the dryer, located the problem, ordered parts, replaced, closed up the machine and drank a beer.
2 of 3 people found this instruction helpful.
Was this instruction helpful to you?
Thank you for voting!
Customer:
KHANH from Seattle, WA
Parts Used:
Y303836, WP9703438
Difficulty Level:
Really Easy
Total Repair Time:
15 - 30 mins
Tools:
Nutdriver
Makes Noise
Remove 2 screws under front Panel and take the front panel out. Then remove 4 screws and then remove the support drum panel out. Remove old blower. and replace the new one. Continue with reverse above steps.
1 person found this instruction helpful.
Was this instruction helpful to you?
Thank you for voting!
Customer:
Michael from Dyess AFB, TX
Parts Used:
Y303836, 12001541
Difficulty Level:
Easy
Total Repair Time:
30 - 60 mins
Tools:
Pliers, Screw drivers
The blower broke and was making noise.
Followed instructions on the videos.
0 of 1 people found this instruction helpful.
Was this instruction helpful to you?
Thank you for voting!
Customer:
Ronald from Kansas City, MO
Parts Used:
Y303836, 33001623
Difficulty Level:
Very Easy
Total Repair Time:
15 - 30 mins
Tools:
Nutdriver, Screw drivers
Buzzer had stopped working & noise from the blower fan that had been whoppling loosely on motor shaft..
1.Unplugged electric dryer.
2.Removed screws from back of control panel to gain entry to remove buzzer switch.
3.As I removed wires from old switch I placed them onto the new switch.
4.Then I removed the one screw that held the buzzer switch in place & replaced with the new buzzer switch.
5.I had removed the blower fan days earlier when I ordered parts from you. So I greased the shaft with lithium grease.
6.Placed new blower fan onto shaft of motor.
7.Then using the snap ring pliers placed the snap ring onto shaft of motor.
8.Then using pliers I placed the clamp onto the blower fan.
9.Plugged up the dryer, then set dryer on a short cycle to see if buzzer worked like it should. It worked.
10. I also was instantly able to notice how quiet the dryer was with the new blower fan on it. Dryer was quiet when working.
11.Dryer worked as well as it did 19 years ago when first purchased.
0 of 1 people found this instruction helpful.
Was this instruction helpful to you?
Thank you for voting!
Customer:
Doug from Southbury, CT
Parts Used:
Y303836
Difficulty Level:
Easy
Total Repair Time:
Less than 15 mins
Tools:
Screw drivers, Socket set
dryer very noisy, blower fan had a lot of play in it
Basically followed the video supplied by web site. Very helpful. I bought the retaining ring pliers which made the job easier. Installed the blower fan with ease and saved a lot of money.
0 of 1 people found this instruction helpful.
Was this instruction helpful to you?
Thank you for voting!
  • 1
  • 2
  • 3
Customer Reviews
Average Rating: (3 Reviews)
5.0
★★★★★
★★★★★
Filter By Rating:
  • 5
    3
  • 4
    0
  • 3
    0
  • 2
    0
  • 1
    0
  • 1
Sort by:
Sorry, we couldn't find any existing reviews that matched. Try using some different or simpler keywords.

Model Compatibility

This part works with the following models:
Fix Number: FIX2200270
Manufacturer Part Number: Y303836
Brand
Model Number
Description
Maytag
DE106
Dryer - Electric
Maytag
DE107
Dryer - Electric
Maytag
DE110
Dryer - Electric
Maytag
DE180
Dryer - Maytag Dryer Model DE180 Parts
Maytag
DE18CA
Dryer - Electric
Maytag
DE18CM
Dryer - Electric
Maytag
DE18CS
Dryer - Electric
Maytag
DE18CT
Dryer - Electric
Maytag
DE19CA
Dryer - Electric
Maytag
DE19CD
Dryer - Electric
Maytag
DE19CS
Dryer - Electric
Maytag
DE19CT
Dryer - Electric
Maytag
DE210
Dryer - Electric
Maytag
DE212
Dryer - Residential
Maytag
DE21CA
Dryer - Electric
Maytag
DE21CM
Dryer - Electric
Maytag
DE21CS
Dryer - Electric
Maytag
DE21CT
Dryer - Electric
Maytag
DE22CA
Dryer - Electric
Maytag
DE22CS
Dryer - Electric
Maytag
DE22CT
Dryer - Electric
Maytag
DE23CD
Dryer - Electric
Maytag
DE24CA
Dryer - Electric
Maytag
DE24CM
Dryer - Electric
Maytag
DE24CS
Dryer - Electric
Maytag
DE24CT
Dryer - Electric
Maytag
DE25CS
Dryer - Electric
Maytag
DE26CA
Dryer - Commercial
Maytag
DE26CD
Dryer - Commercial
Maytag
DE26CS
Dryer - Electric